ISAcreator is a piece of software developed around the ISA-TAB format, a spreadsheet based format meant to provide the necessary elements for describing the experiments, in which protocols and instruments are used to generate images, matrices of measurement points used to monitor a biological system nder study, possibly following a stimulus or some kind of stress. So the main thing is that you are no longer limited to one type of technology. If the same tissue fragment is used to gather biological signal with different techniques, you can use ISAcreator to record all those steps.
Spreadsheets are widely used in biology to track information, we have just leveraged the layout and added specific features to make annotation more effective. For instance,
a built in text editor, useful when describing protocols or overall study description
an ontology widget, which allows to scan resources from NCBO Bioportal or EBI's Ontology Lookup service
a term tagging service. Yes, we realized that the ontology widget was good for selection, but sometimes it is just nice to be able to type free text. That's ok but so much when maintaining archives and databases.
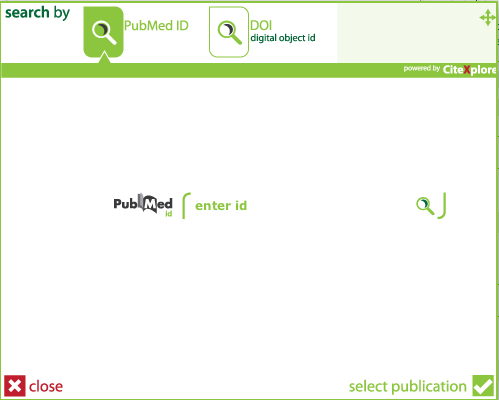
a bibliographic service, which fetches information from Pubmed by simply providing a pubmed identifier
a spreadsheet mapping tool to import legacy data already organized in Excel files for instance
a wizard to create templates from information about the study factors and their levels
a plugin architecture which allows to extend ISAcreator capabilities. We showcase this function with a plugin to generate QR codes from sample information
To do so, from the Main Menu page, select the

. This will show the following screen offering 3 options
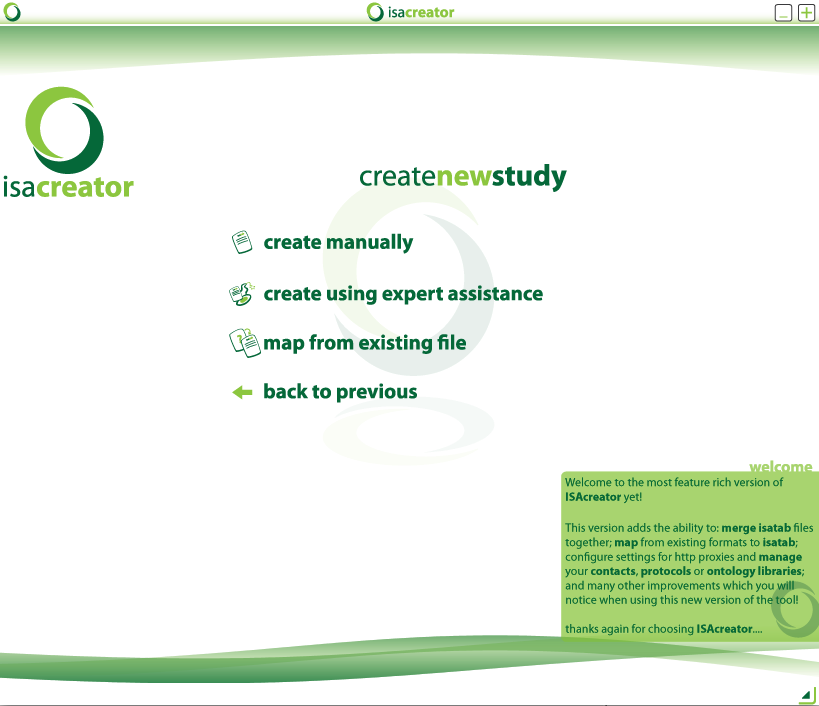 |
From this new page, select the

button.
The action brings you to the empty study view, which is the top level element of ISAcreator environment.
 |
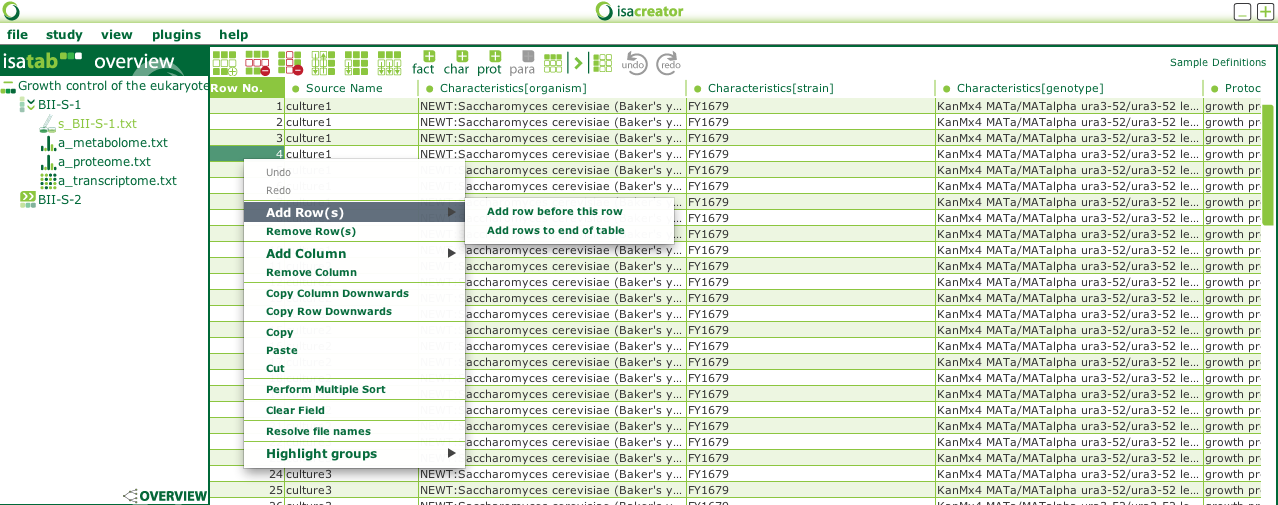
As you can see, the center page contains summary information to help you starting your submission. Before going further, let's pay attention to the layout of page and identify 4 elements
A menu bar sitting on top of the window, just like any other desktop application.
A tree-view pane: this is where you will be able to see the list of spreadsheet related to samples and assay information.
An information box: in the lower left hand part of the windows, the area will be used to display annotation metadata, such as term identifier and term definitions.
A central pane: it makes most of the window real estate and as we will show, is where tables are presented for the users to enter information.
If you are familiar with desktop application, ISAcreator will feel totally comfortable frome the start thanks to the standard layout. Let's review the different menu lists available first.
File Menu
Mousing over the File Menu and clicking it displays the full list of options for that entry:

As you can see, the full complement of classic save functions are there as well option to navigate back to the Main Menu page or leaving the application. Also note that keyboard shortcuts are also available
Study Menu
Mousing over the File Menu and clicking it displays the full list of options for that entry:

Simple actions to add or remove studies.
View Menu
Simple point and click actions for resizing ISAcreator application window:

Keyboard shortcuts are available.
Utilities Menu
This menu enables calls to ISA plugins to be made. More on this in section ****CHANGEME****
Help Menu

In case you need additional information on how to use the tool or send feedback and contact the developer team.
To add a new study, go the Study and click the

Fill in the name of the study to be created and click the add button in the lower end of the sliding window:

You have now entered the Study Overview page. The view in the central pane is divided in 6 sections we are going to review. The upper left pane has changed to display a tree view whose top node is the name of the study, and the child is a link to the Study Sample spreadsheet


NOTE: user interface may be simplified and this section removed entirely


NOTE: user interface may be simplified and this section removed entirely, replaced by a menu action
Spreadsheet tool bar and menu buttons


Sometimes, it is just easier to display records as columns, especially when many descriptors are recorded. Therefore, ISacreator provide a transposed view. This function can triggered throught this activation button:
Visual cues are often important help to home in on specific information. The Transposed view provides toggle highlight buttons to do so:
To activate:
To deactivate:
Scrolling to a particular record can be cumbersome, especially when large sets of records are handled. Therefore, a quick and straightforward to use navigation tool is available, allowing jumping to a particular record: